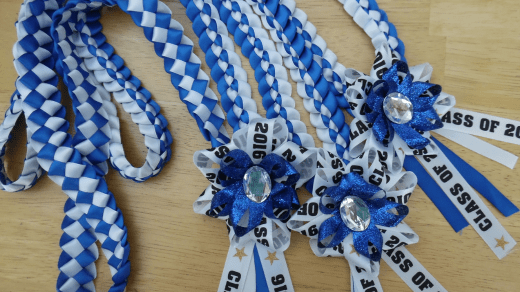
A lawakua ribbon lei is a beautiful and intricate Hawaiian ribbon lei that is often made for special occasions and celebrations. Creating a lawakua ribbon lei requires patience and attention to detail, but the end result is a stunning piece of wearable art. Here’s how to make a lawakua ribbon lei:
Materials You’ll Need:
- Several yards of ribbon in your desired colors (satin ribbon is commonly used)
- Scissors
- Sewing needle
- Thread in a matching color
- Tape measure or ruler
- Safety pin (optional)
Instructions:
- Choose Your Ribbon:
- Select the colors and widths of ribbon you want to use for your lei. Traditionally, lawakua leis feature two or more colors that are woven together to create a pattern.
- Cut Ribbon Strips:
- Cut the ribbon into long strips, typically around 36 inches (1 yard) in length each. You can vary the length to create different effects, but make sure all the ribbon strips are the same length.
- Fold Ribbon in Half:
- Take one ribbon strip and fold it in half so that the ends meet. This creates a loop at one end.
- Thread Needle:
- Thread a needle with a length of matching thread. Tie a knot at the end of the thread to secure it.
- Secure the Loop:
- Hold the folded end of the ribbon and pass the threaded needle through the loop, securing it in place.
- Begin Stitching:
- Now, you’ll start the stitching process. Pass the needle through the ribbon loop and pull it through. This creates a small stitch. Make sure not to pull too tight; you want the stitch to be snug but not too constricting.
- Add More Ribbon Strips:
- Continue adding folded ribbon strips, securing each one with a stitch. As you add more strips, they will form a chain.
- Create Patterns:
- To create patterns or color changes in your lei, alternate the colors of the ribbon strips as you add them. This is where you can get creative with your design.
- Keep Stitching:
- Keep adding ribbon strips and stitching until you have achieved the desired length for your lei. Leis can vary in length, but a typical length is around 36 inches to 40 inches.
- Finish the Lei:
- To finish the lei, tie off the thread with a knot, ensuring it’s secure. Trim any excess thread.
- Adjust and Fluff:
- Gently fluff and adjust the loops of ribbon to create a full and beautiful lei. You can use a safety pin to help open and shape the loops if needed.
- Wear or Gift:
- Your lawakua ribbon lei is now ready to be worn or gifted to someone special. You can wear it as a traditional Hawaiian lei for celebrations, weddings, or other festive occasions.
Creating a lawakua ribbon lei can be time-consuming, but the result is a stunning and meaningful piece of art that embodies the spirit of aloha. Enjoy the process and the joy it brings to those who receive your lei.

